
You might remember that I told you I got a Kindle for Christmas from my husband and that I was going to make my own cover/sleeve for it. I pinned a few that I liked and found this great tutorial that I decided to use. The only thing I had to buy was the iron-on fleece interfacing and I used a coupon at Joann’s for that. I went through my fabric bins to find two that would work well together {one as the lining and one as the outside fabric}.

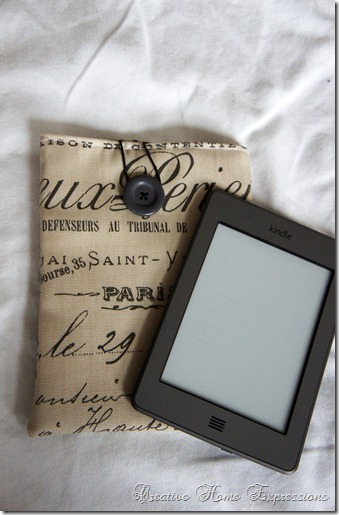
I decided on these two ~ Osnaberg for the lining and the Ballard’s French Document fabric for the outside. I also picked out the button and elastic. Thankfully, I also had these in my supplies.

In the event you don’t want to click over to the tutorial I followed, here is the cliff notes version. You need to measure your item, whether it’s a Kindle, iPad, notebook, etc., with a cloth tape measure. Width all the way around and length all the way around.

You divide those figures in half and then need to add in for the seam allowance ~ 2 inches on the width and 1.75 inches on the length. So for mine it wound up being 7 x 9 inches to cut for the lining and outside fabrics. The interfacing is cut an inch shorter than those figures {6 x 8}.

You iron the fusible fleece interfacing to the wrong side of the outside fabric, place good sides facing each other and sew three sides together, leaving the top open. Sew three sides of the lining fabric together leaving the top open as well as 3-4 inches at the bottom for turning.

Clip your corners, turning the lining right side out and insert into the exterior portion of the sleeve {which is still inside out}, right sides facing. Pin in place and here is where you insert your elastic. I used elastic I had but you can use a hair elastic. Stitch around the top of the case.
Turn the whole case right side out through the hole you left in the bottom of the lining. Poke out your corners in the exterior fabric, sew the hole in the bottom of the lining fabric closed and push it into the case.


Iron it and then do a topstitch. Then you can attach your button. I decided to add a decorative button on top of the button I sewed on. I just hot glued it on.

I would suggest definitely going to the link for the tutorial I followed. She did a very good job explaining everything and I found it very easy to follow.

All done and doing it’s job! Quite prettily, I think!

Linking up with
Wow Us Wednesday at Savvy Southern Style
Winter Blues Wednesday at DIY by Design
Tutorials, Tips & Tidbits at Stone Gable
Creative Things Thursday at The Vintage Farmhouse
The Inspiration Gallery at Craftberry Bush
Make It Pretty Monday at The Dedicated House



![89227636337165235_cJdOQD84_c[1]](https://blogger.googleusercontent.com/img/b/R29vZ2xl/AVvXsEh0Bdfbq91RyjWSpDn-6O7tW5wdHx49TWSDox-Umgy-qfdEuMilCu95O2fV8LQrwqIam5Th1Ezb1BTGGKoARwCu6Zx3eLKHY10eP12qzQTWY_2E4izSPvpSDzilrBG0umw1abYxyGP6oNk/s1600-h/89227636337165235_cJdOQD84_c%25255B1%25255D%25255B3%25255D.jpg "89227636337165235_cJdOQD84_c[1]")


